happy friday! i hope this week has opened your eyes to the limitless possibilities you have in photography. and, we have only hit the tip of the iceberg.
today we are going to combine the first two elements (aperture and shutter speed) of the exposure triangle (shown here).  as we have learned both aperture and shutter speed control the amount of light let in to your image sensor. these elements (along with ISO) control the light or darkness of your picture (exposure). we have also learned that if you adjust one element of the exposure triangle, you must adjust another in order to compensate for the change and get an evenly exposed picture.
let’s take a look below.
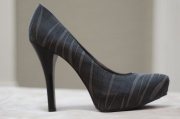
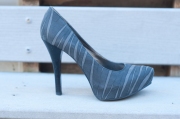
 as you will notice each picture is of the exact same object in different lighting situations. they are all numbered in the upper right hand corner. let’s break them down to further understand scenarios when adjusting aperture and shutter speed are important.
 picture #1 – this picture was taken inside with only natural light. no flash was used. therefore, i needed to let in as much light as possible to correctly illuminate my image. therefore, i opened my lens the maximum aperture (f-stop 1.8) to allow the most light i could to reach my image sensor. this means i had to adjust my shutter speed to even out the exposure. the picture ended up evenly exposed at a shutter speed of 1/60.
picture #2 – this picture was taken outside in direct sunlight. i used to same aperture and  shutter speed to demonstrate the need to adjust both when switching to different lighting.
 picture # 3 – this picture is the exact same as the one above, only i adjusted my shutter speed. because the sunlight lets so much light into the image sensor, the aperture of 1.8 let’s in too much light. even with my camera’s maximum shutter speed of 1/4000 the image is still a little too light.
picture #4 – again, this picture is exactly the same as picture 2 and 3. this time i lowered  my aperture (raised my f-stop) to 3.5 letting less light in. i also had to adjust my shutter speed to compensate. this image is evenly exposed at an f-stop of 3.5 and a shutter speed of 1/3700.
 picture # 5 – this picture is also taken outside, but in the shade. i kept the same aperture (f-stop 3.5) as the previous picture (which was taken in direct sunlight) to demonstrate the use of shutter speed. with my aperture the same, i needed to dramatically slow my shutter speed in order to let more light in. therefore, this picture is evenly exposed with a shutter speed of 1/250 and an f-stop of 3.5.
picture #6 – this picture is taken in the same location as picture 5. with this picture i wanted to demonstrate that you could also raise your aperture (lower your f-stop) to  achieve the same evenly exposed picture (this will be important as we learn more about shooting manually). here i lowered my f-stop to 1.8 which means i also need to raise my shutter speed to 1/1250. i need to raise my shutter speed because if i would have kept the slower shutter speed of 1/250 from picture 5 along with lowering my f-stop there would have been too much light reaching the sensor, therefore causing an over exposed image. thus, demonstrating again that if you change one element of the exposure triangle you must also change another to compensate for the new amount of light being let in.
congratulations! you now understand the important relationship between shutter speed and aperture. tomorrow we will go over ISO and sunday we will bring it all together, making you an exposure triangle aficionado.
as always, i encourage you to practice what you’ve learned. pick a set ISO and adjust your aperture and shutter speed. i find it helps to use the same prop in different locations (inside, outside, sun, shade) to fully understand how exposure works. always take notes on what your image looks like with higher and lower f-stops and faster and slower shutter speeds.
i would love to see your images from today. post below in the comments and let’s see what you come up with.
good luck! and happy shooting!
